Do you know that data losses or website downtime cost global businesses around $1.7 trillion annually? Be it through a malware attack or a human error, your website can crash or lose data thanks to a variety of factors beyond your control. It’s no surprise then that small and large businesses alike are beginning to take website security very seriously. And about time too.
Website backups are probably the best guard against an unforeseen website crash. This is why backups have become a seemingly integral part of website maintenance. To understand what makes backups so crucial for WordPress websites, let’s take a look at the consequences of not having an efficient backup strategy:
A complete backup file contains your WordPress website files, database files, installed third-party plugins and WordPress themes. Without a reliable backup, a crashed website could take weeks or even months to be restored!
A hacked website or a website crash can result in search engines like Google blacklisting your website to protect its users. Alternatively, your WordPress web host provider could also suspend your website account. This could result in a major loss of incoming traffic and an obvious dent in your business reputation.
Downtime from a hacked website can also impact your business revenue, particularly if you are running an online E-commerce store or any online business that generates revenue.
Any business or professional website takes both human effort and time to be developed and maintained for high user engagement. All these efforts can come to naught when your website crashes or is compromised by hackers.
Luckily there are multiple ways of taking a sound backup of a WordPress website, including:
- Manual backups
- Backups from your web host service provider
- Automated backups using plugins
Let’s now evaluate each of these methods in detail and determine what works best for you.
Manual Backups
A comprehensive website backup would include both the WordPress website files and database records. A backup that does not contain either one of these would be incomplete and not suitable for efficient restoration of the website. WordPress website files typically contain the core WordPress files, installed plugins/themes, and other website-related files. The WordPress database typically contains customer records, online posts or comments, user profiles and the like.
A manual backup of your WordPress website comprises of the following 2 steps:
- Backup of WordPress website files using an FTP tool like FileZilla or Transmit.
- Backup of WordPress database using the phpMyAdmin tool or cPanel.
Here’s how you can take a manual backup of WordPress files using an FTP tool:
- Download and install an FTP tool like FileZilla.
- Retrieve your FTP (or SFTP) login credentials (from your web host account) that is necessary to provide access to your WordPress files.
- Use the FTP tool to enter these user credentials (username, password, and IP address) to connect to your hosting server. Once the connection is made, you will be able to view all the WordPress website files and folders.
- Select all the files and folders and download them to a destination folder (used only for storing backups) on your local computer.
Alternatively, you can drag and drop selected files or folders to the destination folder using the FTP tool interface.
And here’s how you can take a manual backup of your WordPress database using the phpMyAdmin tool:
- Open the phpMyAdmin tool provided by your web host.
- From the “Databases” panel of your phpMyAdmin tool, select the database that you are using for storing your WordPress data.
- Select all the database tables (stored in the selected database file) and click “Export” to save your database files (in SQL format) on a selected destination folder on your computer.
With these two sets of instructions, you now have a complete backup of both WordPress and database files available for access in the future.
Backups from Your Web Host Provider
Manual backups are only recommended if you have the technical expertise to execute backups by yourself regularly. Depending on the size of your website, manual backups can be a long and time-consuming affair.
A much better method is to opt for backup-related services if your WordPress web host provider is offering them. While some hosting providers include backups as an integrated offering on all their hosting plans, some others may charge an additional fee for performing backups.
Depending on your backup needs, you can choose a web host provider that offers daily, weekly, monthly, or even hourly backups. To be on the safe side, your web host provider must also allow you to log into the hosting account and take a complete backup whenever required. Additionally, you could have a copy of all your backups downloaded and stored on a local computer or a cloud storage platform.
Automated Backups Using Plugins
The final method of backing up a WordPress website is through the deployment of WordPress backup plugins. You can choose from a variety of popular backup plugins like UpdraftPlus, BlogVault, or BackupBuddy that are easy to install and execute.
With a user-friendly interface, backup plugins are easy to execute even for beginners and do not require any technical knowledge. In a single click, you can get a complete backup of your WordPress files and database and even restore stored backups to your website whenever required.
What should you look for in a plugin?
Ideally your backup plugin should offer the following:
- Incremental backup technology to prevent any overloading of your server and for optimum server performance.
- Offsite storage of backups to ensure the safety and availability of your backups for quick restoration.
- Scheduled backups that can be executed at fixed intervals (daily, weekly, or monthly) along with on-demand backups that can be executed whenever needed.
- Complementary features like staging to test backups before restoring and website security.
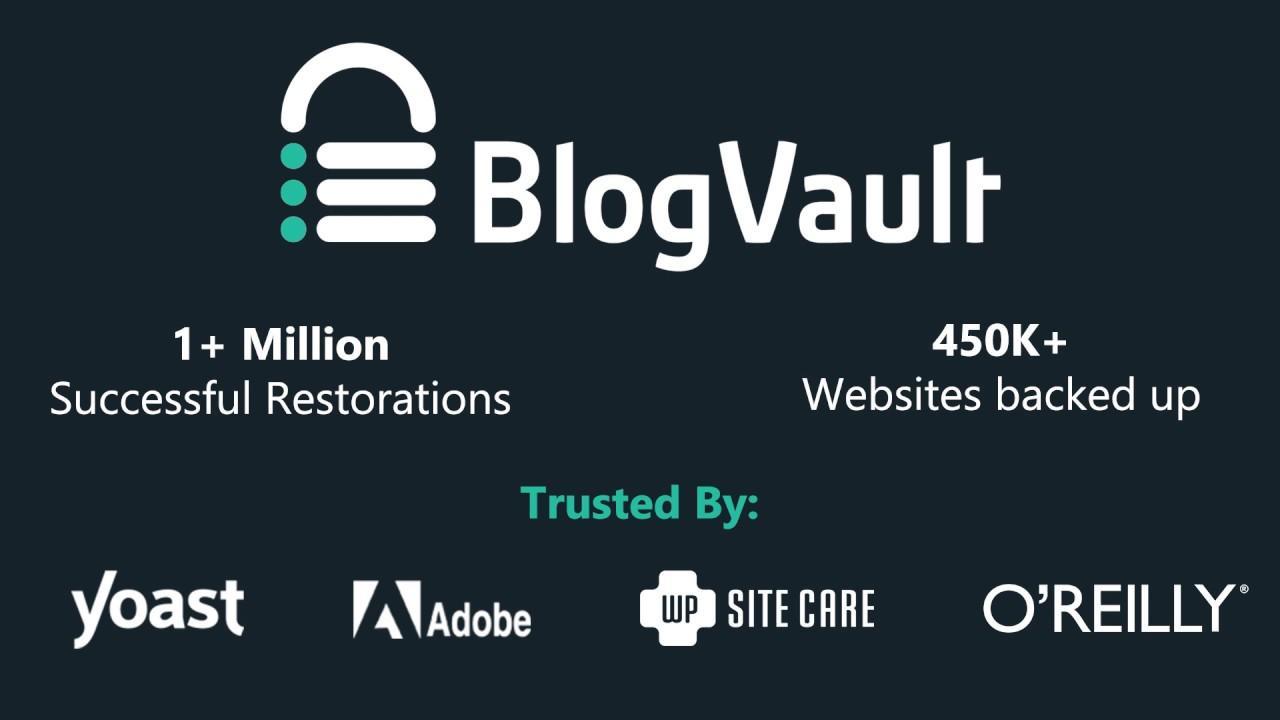
One plugin that offers all this and more is the BlogVault plugin. It has comprehensive features and has been used to backup over 450,000 websites.
Some of its other features ares:
- Support for real-time backups: Customised for E-commerce retail stores where every single change/ addition is recorded and backed up.
- One-click backups and restores: An independent and centralized BlogVault dashboard to manage multiple websites.
- 90 days of backup archives to restore as per your requirements.
- Supports backups of WordPress multisite networks.
- Added in-built functionalities like website staging, easy migrations, website management and security.
Let’s take a look at how to use this tool.
How to Execute a Backup Using BlogVault
Essentially, you need to execute the following main steps to take a complete website backup:
- Register with your email address.
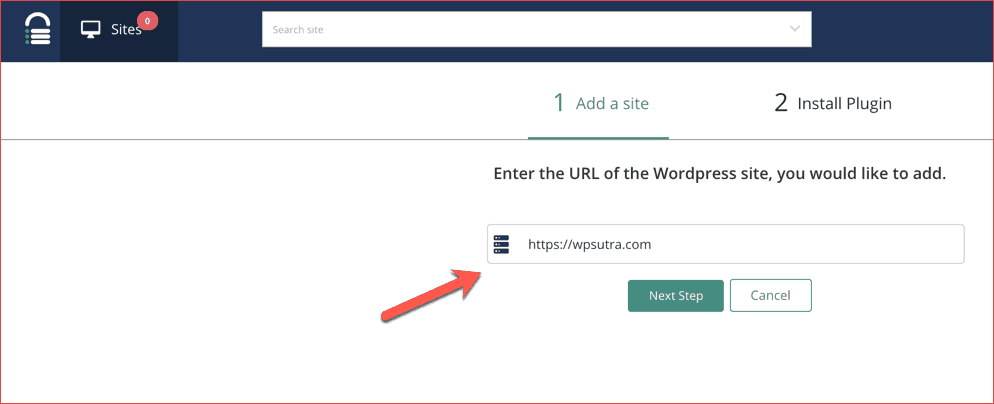
- Sign-in to your account and from the “Site Details” page of your dashboard, click “Add New Site” and specify the website URL that needs the backup.
- The next step is to install the BlogVault plugin for the specified website.
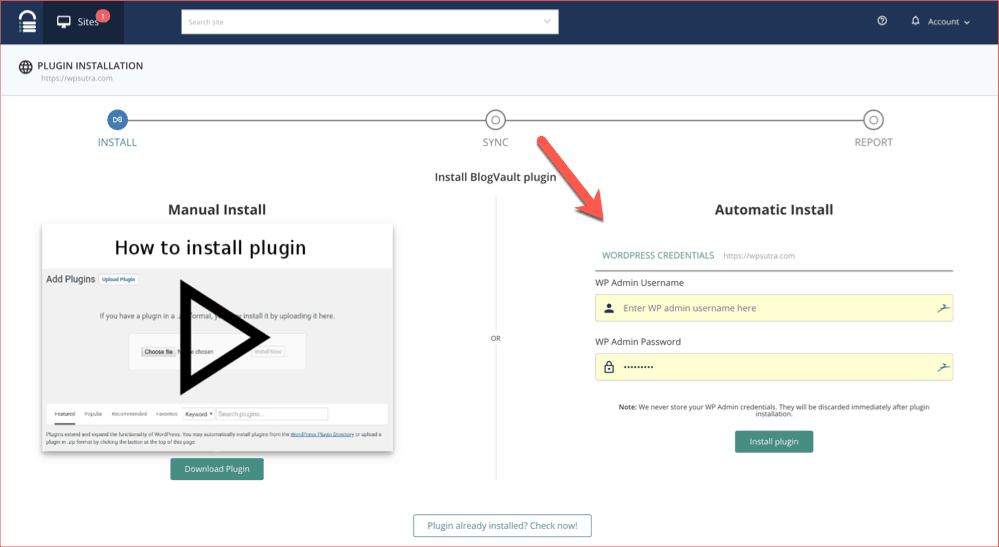
You can opt for either of the following installation methods:
- Manual install, where you can download the BlogVault plugin to your computer, log in to your admin account and from the “Plugins” section, click “Add New” to install the downloaded plugin.
- Automatic install, for which you need to enter your WordPress credentials in the login page that appears. This installation method is easier and much faster to execute.
After successful installation, it automatically takes a complete backup of the specified website.
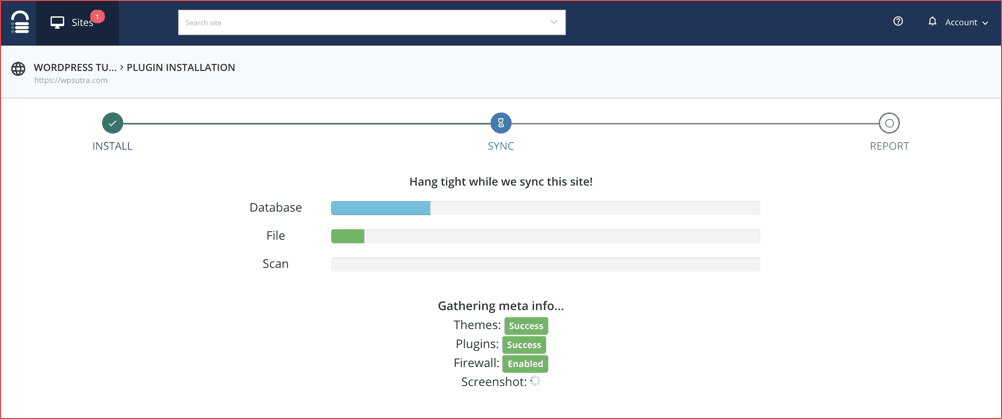
What about subsequent backups? BlogVault allows you to easily configure scheduled backups or on-demand backups from its dashboard.
Here’s how you can perform on-demand backups:
-
- Login to your dashboard and navigate to the “Site Details” page that shows the backup-related status of your added website.
- Click the “Sync Now” button to sync the latest website files with the existing backups. Alternatively, you can click the “Backup Now” button in the “Backup” section of the “Site Details” page to perform the same operation.
In Conclusion
In today’s world, it’s imperative for every business to not only design great-looking websites but also safeguard their websites from the damage of hacks or crashes. For WordPress websites, a comprehensive backup solution is the best guard against any data breaches or website downtime.
If you don’t already have a backup strategy in place, we highly recommend you invest in it right away. Compared to manual backups or backups from your web host provider, automated backups using WordPress plugins are easier and faster to implement without much technical know-how. Have any other questions? Let us know in the comments.